Empennage Attach ( 1 hr )
Back from 2 days at AirVenture (& 3 days in Door County). Learned a few vital details from Van's crew, plus valuable time exploring Dynon and Garmin for avionic options. While not planning to purchase until much later in build, I needed to start clarifying and comparing (kind of mind boggling at first...but I'm starting to know what questions to ask !)
Rec'd confirmation from Van's Product Support on Mon, July 25 A-OK with elevator set up...so ready to proceed. Had to drill out E-bushing from .120" diameter hole to fit #30 drill (about .006" larger)...which was not mentioned in instructions. Clamped a 7.1mm wood spacer between Elev Horn and Inboard Hinge Bracket, then drilled hole in Horn per Step 4. Ready to repeat for RH side and enlarge both to 1/4", but our swimming pool was calling !
Sunday, July 31, 2016
Saturday, July 23, 2016
Empennage
Empennage Attach (1.5 hrs)
LH Elevator attached to rod end bearings (i.e. hinges). When assembled, determined center rivets along spar rubbing rolled leading edge of elevator in up position. Also measured only 40.3 mm reference Fig 2 at Sect 10-3 clearance to Elevator Horn, vs 41.3 expected. So, disassembled to revise rod end bearings to 21.6mm vs 20.6 (13/16") originally. Did both LH and RH elevator to maintain consistency/alignment. Also gently revised shape of rolled leading edge...less "flat" at center, more peaked toward center to better clear when raised or lowered.
 Re-assembled, and no contact at max 30 deg up, or as lowered. However, can't reach full 25 deg down due to interference with Elevator Horn and lower flange on HS spar. This area is "notched" for clearance, but need to trim ~ 2 mm to allow full down travel to 25 deg. Want to wait until RH is installed to do both Elevator Horn clearances at same time.
Also used drill press and small file to reduce diameter of E-bushing so slides into VA-146A per instructions. Ready to drill horn next.
LH Elevator attached to rod end bearings (i.e. hinges). When assembled, determined center rivets along spar rubbing rolled leading edge of elevator in up position. Also measured only 40.3 mm reference Fig 2 at Sect 10-3 clearance to Elevator Horn, vs 41.3 expected. So, disassembled to revise rod end bearings to 21.6mm vs 20.6 (13/16") originally. Did both LH and RH elevator to maintain consistency/alignment. Also gently revised shape of rolled leading edge...less "flat" at center, more peaked toward center to better clear when raised or lowered.

Also used drill press and small file to reduce diameter of E-bushing so slides into VA-146A per instructions. Ready to drill horn next.
Friday, July 22, 2016
Empennage
Empennage Attach ( 1 hr )
New Section 11, Empennage Attach started with installation of 4 rod bearings in Elevator ( 2 each LH and RH). Instructions state 13/16" from spar surface to hole center - which is kinda tricky to measure - but confident got them consistently all at 13/16". (Van's instructions: "as close as possible" does leave tolerance up to builder - so 'eye ball exact' was my criteria)
New Section 11, Empennage Attach started with installation of 4 rod bearings in Elevator ( 2 each LH and RH). Instructions state 13/16" from spar surface to hole center - which is kinda tricky to measure - but confident got them consistently all at 13/16". (Van's instructions: "as close as possible" does leave tolerance up to builder - so 'eye ball exact' was my criteria)
 |
| From straight above, and w/ swivel centered, does measure 13/16" |
Thursday, July 21, 2016
Empennage
Aft Fuselage ( 2 hrs )
Prepared fuselage for Nancy to lay inside for the final rivets at the Top Skin. We used empty 2 liter soda bottles as air bladders to support large cushions. Worked great - no problems with center Battery Angle & Bellcrank Rib Assembly. What a trooper - she helped buck all the rivets from inside in one session ! Yahoo ! done with Aft Fuselage build.


Prepared fuselage for Nancy to lay inside for the final rivets at the Top Skin. We used empty 2 liter soda bottles as air bladders to support large cushions. Worked great - no problems with center Battery Angle & Bellcrank Rib Assembly. What a trooper - she helped buck all the rivets from inside in one session ! Yahoo ! done with Aft Fuselage build.


 |
| Installed access plates - optional version w/ flush screws. |
Wednesday, July 20, 2016
Empennage
Aft Fuselage ( 1.5 hrs )
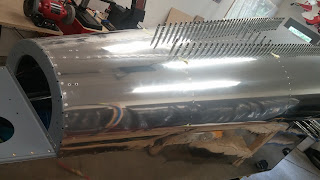
Finished 9 rivets along longeron for RH Top Side Skin with Nancy's help bucking from inside. Started Sect 10-32 - last page for Aft Fuse build ! Cleco'd in Top Skin, then removed to increase the "break" along rearmost portion where side skins have tightest radii. Used hand seamer, per Van's notes. Better, but LH Side Skin has slight waviness due to dimpling that can't be corrected under the Top Skin. Not much, but more "break" wouldn't eliminate either. So... it'll fly great anyway. Since Nancy was helping install cleco's, we went ahead and inserted 100%, although probably not necessary.

Riveted rearmost area using my long reach...including some at next bulkhead. Next, need to lower assembly to floor and prepare for Nancy to back rivet from inside. Oooh - boy !


Tuesday, July 19, 2016
Empennage
Aft Fuselage ( 1.5 hrs )
Riveted RH Top Side Skin along longeron, and 3 bulkheads. That's all I could reach...even with my longer than average arms. So waiting until Nancy is available to assist with remaining approx 10 rivets along forward portion of longeron.

Riveted RH Top Side Skin along longeron, and 3 bulkheads. That's all I could reach...even with my longer than average arms. So waiting until Nancy is available to assist with remaining approx 10 rivets along forward portion of longeron.

Monday, July 18, 2016
Empennage
Aft Fuselage ( 1.5 hrs )
Dimpled RH Top Side Skin, then mounted to Aft Fuse via cleco's. Ready to rivet !


Dimpled RH Top Side Skin, then mounted to Aft Fuse via cleco's. Ready to rivet !


Sunday, July 17, 2016
Empennage
Aft Fuselage ( 3 hrs )
Nancy again helped finish rivets along 3 bulkheads for LH Top Skin.

Then I started RH Top Skin prep by deburring all holes, and edges (sanded first with 180, then 400 grit. For some of the rougher edges, I use a large file to smooth first ). Also rolled edges (ie "break" edges to insure lay tight onto overlapped skin.
Saturday, July 16, 2016
Empennage
Aft Fuselage ( 1 hrs )
Again my wife helped me during riveting of LH Top Side Skin onto Aft Fuselage along longeron - she used tungsten bucking bar inside while I used flush set in rivet gun. Turned out great. Beautiful weather, so we quit to go ride our Harley (about 78 degrees, low humidity...unusually "mild" for this time of year)

Again my wife helped me during riveting of LH Top Side Skin onto Aft Fuselage along longeron - she used tungsten bucking bar inside while I used flush set in rivet gun. Turned out great. Beautiful weather, so we quit to go ride our Harley (about 78 degrees, low humidity...unusually "mild" for this time of year)
 |
| Staged this pic, because she was on other side holding bucking bar actually. |

Wednesday, July 13, 2016

Tuesday, July 12, 2016
Empennage
Aft Fuselage (3.5 hrs )
Prepared LH Top Side Skin by rolling edges (ie putting slight break along edge), then deburring edges and all holes. Dimpled #30 and #40 holes ( a few exceptions ). Decided to work through attaching LH side before starting on RH side - mostly to preserve space on shop tables.

Prepared LH Top Side Skin by rolling edges (ie putting slight break along edge), then deburring edges and all holes. Dimpled #30 and #40 holes ( a few exceptions ). Decided to work through attaching LH side before starting on RH side - mostly to preserve space on shop tables.

Monday, July 11, 2016
Empennage
Aft Fuselage ( 3 hrs )
Scuffed, Cleaned w/ Acetone, and Primed with 7220. Then back riveted 3 pieces onto Top Skin. At the Upper Aft Fuse Rib, req'd using offset "universal" (I don't have an offset back rivet tool) in rivet gun to reach shop ends. Worked great - w/o bending rib to access. Onto Sect 10-30 LH and RH Top Side Skins. Getting close to completing the Aft Fuse build...


Scuffed, Cleaned w/ Acetone, and Primed with 7220. Then back riveted 3 pieces onto Top Skin. At the Upper Aft Fuse Rib, req'd using offset "universal" (I don't have an offset back rivet tool) in rivet gun to reach shop ends. Worked great - w/o bending rib to access. Onto Sect 10-30 LH and RH Top Side Skins. Getting close to completing the Aft Fuse build...


Sunday, July 10, 2016
Empennage
Aft Fuselage ( 3 hrs )
Flying in the morning, building an airplane in the afternoon - it's a good life ! Started Sect 10-29 Assembly. Deburred all edges and holes, then dimpled per instructions all 4 pieces. Fit up is good, so ready to scuff, acetone clean and prime next.

Flying in the morning, building an airplane in the afternoon - it's a good life ! Started Sect 10-29 Assembly. Deburred all edges and holes, then dimpled per instructions all 4 pieces. Fit up is good, so ready to scuff, acetone clean and prime next.

Saturday, July 9, 2016
Empennage
Aft Fuselage (3 hrs )
Finished Sect 10-27 via bucking those rivets that I couldn't use Main Squeeze on. Several sizes on Fig 2 diagram by Van's were too short ! vs 'checking gauge'...so substituted next size ( -8 vs -7, -5 vs -4, and even -6 vs -4 spec'd). Surprised not just a 0.5 off, but whole length. These were in locations with additional layers that perhaps designers/engineers didn't account for. It's always good idea to check lengths throughout build, as other builders have noted. So...if you are building, check with gauge tool vs reliance only on dwg call outs.
 Several rivet locations with "protruding ears" nearby (mounting tail assemblies eventually) required offset extension in rivet gun. These required much higher pressure adj. at gun since lots of impact energy seems to be lost due to offset.
 Hooray ! Mounted Vert Stabilizer per Sect 10-28. Drilled (2) #12 size holes through stab spar into rearmost bulkhead. Disassembled and re-stored V.S. for later section fit up after top skins are completed on Fuse.

Finished Sect 10-27 via bucking those rivets that I couldn't use Main Squeeze on. Several sizes on Fig 2 diagram by Van's were too short ! vs 'checking gauge'...so substituted next size ( -8 vs -7, -5 vs -4, and even -6 vs -4 spec'd). Surprised not just a 0.5 off, but whole length. These were in locations with additional layers that perhaps designers/engineers didn't account for. It's always good idea to check lengths throughout build, as other builders have noted. So...if you are building, check with gauge tool vs reliance only on dwg call outs.


Friday, July 8, 2016
Empennage
Aft Fuselage ( 1 hr )
Riveting Aft Deck - using Main Squeeze, I can reach majority rivets. Discovered 2 rivets on each side of F01411D Angle needs to be -8 long, not specified -7 at Fig 2 on Sect 10-27 (additional layer due to longeron C channel at this location - see sticky note in pic)

Riveting Aft Deck - using Main Squeeze, I can reach majority rivets. Discovered 2 rivets on each side of F01411D Angle needs to be -8 long, not specified -7 at Fig 2 on Sect 10-27 (additional layer due to longeron C channel at this location - see sticky note in pic)

Thursday, July 7, 2016
Empennage
Aft Fuselage ( 4 hrs )
Cont'd Sect 10-27 at Step 5 & 6: Match drilled 2 angles, then deburred all holes. Primed all pieces for Aft Deck assembly. Started rivets Step 7 - significant variety of sizes and types in one area needing numerous tool set-ups. Challenging to determine best approach, but trial and error is working, combined w/ prior experience on what works well, etc. All these pieces and rivets are critical since this is where Horiz Stab and Vert Stab attach...lots of loading !

Also jumped ahead to Sect 10-32 to build the rear Access Cover Plates. Deburred all edges and holes, then used #6 screw size dimple dies to create recess for flush machine screws per the Optional arrangement. I "broke" the edges with the roller tool to insure Plates lay tight to fuselage skins. Glad I chose the Optional, even though under HS, it's "slicker" with flush screw heads.
 |
| Already mounted once with machine screws...forgot to take pic. |
Wednesday, July 6, 2016
Empennage
Aft Fuselage (2.5 hrs )
Determined needed about 4" more of C1037 and C1036 wires toward front...so entire W00057 Aft Fuse Harness had to have tie wraps removed, re-adjusted position about 5 inches, and re-installed. Sect 10-25 doesn't provide length of C409P connector/hharness portion at rear. But while working on Aft Deck installation, determined I had excess length at rear (Sect 10-27 Fig 3). Other antenna and harness directions clearly show critical length of free ends on installation pages. So would've been helpful on 10-25 ! Required about 1 hr to re-do.
Sect 10-27 cont'd with dimpling and fit up of Aft Deck pieces. Discovered missed dimpling across top of F0140C bulkhead - but fortunately easily done w/ Main Squeezer (whew). Re-primed the 8 holes. Cleco'd and Final Drilled all holes. I'll prime after Match Drilling the 2 angle reinforcements.
Determined needed about 4" more of C1037 and C1036 wires toward front...so entire W00057 Aft Fuse Harness had to have tie wraps removed, re-adjusted position about 5 inches, and re-installed. Sect 10-25 doesn't provide length of C409P connector/hharness portion at rear. But while working on Aft Deck installation, determined I had excess length at rear (Sect 10-27 Fig 3). Other antenna and harness directions clearly show critical length of free ends on installation pages. So would've been helpful on 10-25 ! Required about 1 hr to re-do.
 |
| C1036 & 37 were 4 inches short of bulkhead |
 |
| Corrected...taped to front of bulkhead |
 |
| fit is good ! |
 |
| ready to match drill 2 angles |
Monday, July 4, 2016
Empennage
Aft Fuselage ( 2.5 hrs )
In between parade and fireworks, I was able to fit in couple hours in shop. Finished Static Air Kit by installing fittings between Port and tubing (now that bonds had fully cured).
Then Sect 10-27: deburred three pieces for Aft Deck. Scuffed since I was already covered in dust, so I'm ready to dimple, etc next.

In between parade and fireworks, I was able to fit in couple hours in shop. Finished Static Air Kit by installing fittings between Port and tubing (now that bonds had fully cured).
 |
| Wiring routed, Air Kit installed |
 |
| Cleaveland Static Air Kit installed. |
Then Sect 10-27: deburred three pieces for Aft Deck. Scuffed since I was already covered in dust, so I'm ready to dimple, etc next.

Sunday, July 3, 2016
Empennage
Aft Fuselage ( 5 hrs )
Riveted Rudder Guides into Side Skins w/ specified blind rivets (thin washers critical to withstand loading against nylon blocks).
Installed Static Lines - replaced Van's provided with Cleaveland's Upgrade Kit . Bonded in the 2 Static Source Ports using J-B Weld epoxy (needs to cure 4-6 hrs, w/ full strength in 15 hrs) after cleaning surfaces with acetone.
Routed tubing using 4" tie wraps - loose to later attach fittings to Ports, etc. Moved on to Sect 10-23: Installed UAT Antenna Cable. Sect 10-24: Installed ELT Antenna Cable, Finished details in Sect 10-25 (prior routing done prior Skins added LH side) for Aft Fuselage Harness. And finished details in Sect 10-26 for "Phone" Cable.

I will be calling Van's tech support to determine why wires C1036 and C1037 are each about 6 inches short of bulkhead F01406B. Can't see how I've misrouted, etc. Everything else fits A-OK and is neatly tie wrapped at designated locations, protecting from rubbing on edges, etc.
Riveted Rudder Guides into Side Skins w/ specified blind rivets (thin washers critical to withstand loading against nylon blocks).
 |
| Inside view after blind rivets |
 |
| Outside view of Port (one each side) |

I will be calling Van's tech support to determine why wires C1036 and C1037 are each about 6 inches short of bulkhead F01406B. Can't see how I've misrouted, etc. Everything else fits A-OK and is neatly tie wrapped at designated locations, protecting from rubbing on edges, etc.
Saturday, July 2, 2016
Empennage
Aft Fuselage ( 1 hr)
Sect 10-21: Installed 3 sizes of snap bushings in various locations...some for rudder cable, others for antenna, etc Then routed the Rudder Cables. Needed to machine C'sink the "nylon" blocks to fit #30 size dimples on Side Skin. Ran out of time to rivet these in place...

Sect 10-21: Installed 3 sizes of snap bushings in various locations...some for rudder cable, others for antenna, etc Then routed the Rudder Cables. Needed to machine C'sink the "nylon" blocks to fit #30 size dimples on Side Skin. Ran out of time to rivet these in place...
 |
| View inside aft fuselage showing cable guides. |

 |
| Nancy's ready to go flying ! |
Friday, July 1, 2016
Empennage
Aft Fuselage ( 1 hr )
Finished Sect 10-19 (finally...a lengthy page with essentially one step...riveting). Nancy's help was significant for LH Side joint to Bottom. I was again underneath on a chaise lounge chair brought in from pool area, while she held the titanium bucking bar from top/inside. Next, Sect 10-21 for installing rudder cables.
Finished Sect 10-19 (finally...a lengthy page with essentially one step...riveting). Nancy's help was significant for LH Side joint to Bottom. I was again underneath on a chaise lounge chair brought in from pool area, while she held the titanium bucking bar from top/inside. Next, Sect 10-21 for installing rudder cables.
Subscribe to:
Posts (Atom)