I've started my adventure to build a Van's Aircraft RV14a. For several years, I've been planning to build an Experimental (homebuilt) airplane - once retired.
But first, I needed to get my Pilot's License. (Kinda key !) So... first things first: I retired March 2014 from Caterpillar - and started flying lessons in the Summer of 2014. Soloed a day after Christmas, and got my Private July 2015. Shop set up, tools acquisition, and practise kits during Fall launched me into my build starting Dec 31, 2015 !

I've chosen to build the RV14a since it's about 10% larger than Van's prior models - so it fits my 6'4" frame well. Van's is well known for great value & outstanding flying qualities. It's been a no brainer decision for me. A tour of their facilities and demo flight in Oct 2013 clinched the deal. My wife - also a pilot - exclaimed after her demo flight "retire NOW so you can build one of these". The RV14a fits my mission of a good compromise between cross country & aerobatics. Plus...I fit, too.

So far, one month into building, it's been rewarding. Very challenging, but certainly a learning experience. The builder community is terrific - as is Van's tech support. I'm finished with the Vert Stab and Rudder (Jan 2016). So... with a 5 month delivery lead time, I've ordered the Quick Build Wings and Fuselage.

I hope this blog assists other new builders, just like several others have been valuable to me. Plus it will serve to document my build step by step. Please drop me a line via the "contact me" form on lower RH margin.
Update: April 2020 relocated to Wickenburg, Az to escape Illinois winters.
Showing posts with label Propeller. Show all posts

Friday, January 25, 2019

Firewall Forward Kit - Propeller

Spinner completed ( 3 hrs )

Loosened Spinner Plate from Prop Hub (actually removed nuts and washers so completely "off") so I could rivet Gap Fillers per Sect 44-07, Step 7.   Re-assembled & torqued Hub bolts/nuts to 21 ft-lbs per Hartzell Manual Table 3-1.  Trial fit Top Cowl to check gap to Spinner Plate.   Marked Spinner to trim to match edge of Spinner Plate.  Re-installed Spinner and sanded flush to edge of Plate completing Step 8, Sect 44-08.   Now done with Propeller and Spinner!
Spinner Plate loose from Hub to enable
riveting Gap Fillers
Re-installed Spinner Plate after riveting each Gap Filler.   Excess past edge of Spinner Plate yet to be removed


checking with Top Cowl to insure clearance, and
need to remove aft edge Gap Filler, as well as
similar overhang on Spinner.   ( after this pic, 
sanded Gap Filler and Spinner flush to aft edge
of Spinner Plate)

Thursday, January 24, 2019

Firewall Forward Kit - Propeller

Spinner mounting ( 3 hrs )

Added remaining nutplates to Spinner Plate.  Checked fit of Gap Fillers and Spinner to Prop Blades as angled from min to max pitch per Step 6, Sect 44-07.  (per instructions, clamped 30" boards to blade about 10" from end for leverage).  Trimmed small amount fiberglass to meet 1/8" clearance.  Torqued and safety wired 4 bolts holding Front Bulkhead.  Started Step 7 to rivet Gap Fillers to Spinner Plate  - but determined I will need to loosen 4 bolts holding Plate to Hub to gain tool clearance.  At first it seemed I could rivet with Plate still in place, but 2 rivets are too close to blades for either "Main Squeeze", or rivet gun/bucking bar.  Drat...    Received shipment from Vans with my Landing Lights and Wing Tip Nav/Strobe Lights.   These are Aero LEDs recommended by Vans. 
Front Bulkhead for Spinner
All 22 nutplates and Screws installed.
Final clearance at Prop

Landing Light Kits...brackets, hardware

Nav /Strobe Lights for Wing Tips

Tuesday, January 22, 2019

Firewall Forward Kit - Propeller

Spinner nutplates ( 2 hrs )

Drilled #19 clearance holes for 6-32 attachment screws (AN526C632-R8).   Riveted on 6 nutplates to Front Bulkhead, then started on 14 nutplates on Spinner Plate.
nutplates on Front Bulkhead
Adding nutplates to Spinner Plate (bit more
challenging since remains bolted to Prop Hub

Monday, January 21, 2019

Firewall Forward Kit - Propeller

Spinner Gap Filler ( 2 hrs )

Completed Spinner Gap Fillers per Sect 44-06, Steps 1-8, and 44-07, Steps 1-2.  Created Backer Plates with matched curve to Gap Filler.  Riveted to fiberglass, then added nutplate.  Fits well - and looks good too.  Final clearance for Prop to fiberglass edges remains to be done ( need to clamp boards to Prop to move from min to max pitch angles)
Almost ready to rivet to Spinner Plate.

Next -  grind/file  fiberglass edges for clearance to  prop 


Saturday, January 19, 2019

Firewall Forward Kit - Propeller

Spinner ( 3 hrs )

Completed Sect 44-03, -04, & -05:  positioning and drilling for mounting.  Needed to trim some for clearance around prop, but template from Hartzell insured good fit (Spinner came with outline marked...slightly more forward than template, but close).   Since opaque (comes with pinholes filled) required use of spherical magnets to locate holes in Front Spinner Bulkhead.  Trimmed cut-out pieces to make Gap Filler behind Prop.  Positioned and drilled #40 holes for rivets.  Since not rotating prop (keep oil from being scraped off cylinders and cams, etc ) I had the pleasure of working from underneath Spinner - not fun, but got  'er done.
Front Spinner Bulkhead has 6 pre-punched holes.  Used
spherical magnets to determine hole location through
opaque Spinnner
6 Spherical magnets in place...ready to
mark hole centerlines and drill.


All holes drilled at Front Bulkhead, and
along rear Spinner Plate
Gap Fillers positioned and drilled for rivets


Working underneath was challenging. 

Friday, January 18, 2019

Avionics and Firewall Forward Kit - Propeller

Canopy Harness and Spinner ( 2 hrs )

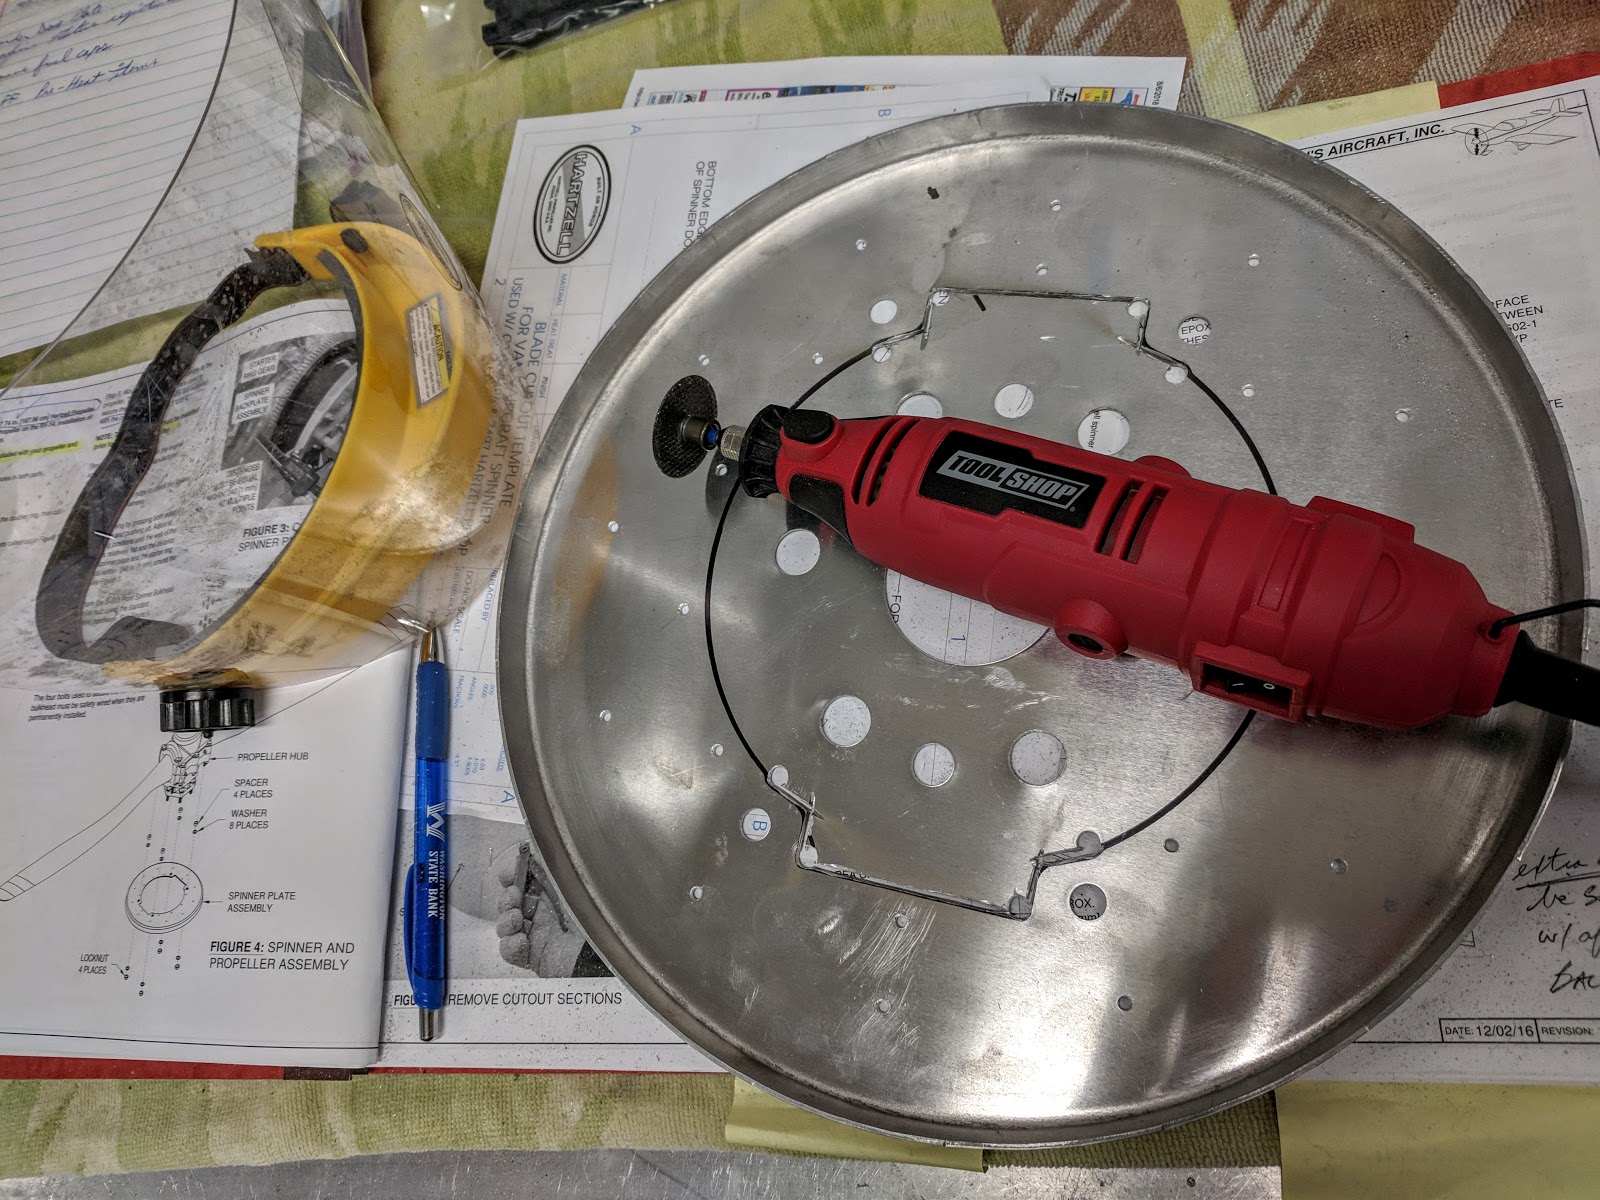
Laced wires and splices, then used spiral wrap to gather LED wiring.  Added clear silicone to hold wires to bottom of glareshield to complete Canopy Harness.  Confirmed all connections OK for  LEDs via 9v battery connected to Pins 7&9 (white) and Pins 8 & 9 (red).  Next, measured gap from Spinner Plate to Started Ring per Step 7, Sect 44-02.  Removed slight "dishing" in Plate and gap ranged from 3.033" max to 3.020" min  - so much less than .040" max variation allowed.  Completed Steps 1 & 2 at Sect 44-03 removing Spinner cut-outs.  Used thin diamond encrusted wheel on dremel (cuts fiberglass like butter !).   Trial fit on Prop shows more material to remove for clearance.
completed canopy wiring under glareshield.

Spinner came marked for cut-outs, but
 I used template Hartzell sent via email. 
Very close, slightly less at top.
Trial fit.   Some clearance needed, but close

Thursday, January 17, 2019

Avionics

LED lights under Glareshield & Pinch Welt ( 3 hrs )

Installed "pinch welt" on edge of glareshield.  Pleased with fit (good grip) and appearance.  Purchased from Classic Aero Designs in 60" length for $7 - used approx 50".  Cut the Red LED and White LED strips to 26.5" (at designated cut line on printed circuit).  Purchased these from PilotLights.net.   Connected to Canopy Harness per Stein Air schematic (to work with PWM dimmers and Garmin GAD27 - see Jan 11 log).  Still need protection and retention of butt splices, but almost done with Canopy.   Temporarily mounted S-603 Front Spinner Plate to prop hub per Sect 44-02.
Red and White LED strips installed, connected via butt splices
 to Canopy Harness.    Bottom view "pinch welt" on edge.
Stein Air provided revised schematic to show wiring
 for separate Red and White LEDs


Front Spinner Plate bolted to prop hub

Wednesday, January 16, 2019

Firewall Forward Kit - Propeller

Propeller Mounting and Alternator ( 3 hrs )

Torqued Propeller Mounting studs to 65 ft-lbs per Table 3-1 and Fig 3-2 ( Step 1 = 40 ft-lbs, Step 2 = 65 ft-lbs) in Hartzell Prop Owners Manual #115N.   Safety wired and applied Torq Seal.  Adjusted alternator belt tension per Maint Procedures Sect 5, page 5-8 in Lycoming Op Reference Manual for IO-390 series.   Set by slip torque method to 145 in-lbs (midway between 132 to 156 in-lbs for New belts. Note: Used belts set to 84-108 in-lbs).  Safety wired lock bolt.
Works well, but wow is this tool expensive.


added torq seal


alternator belt tension set, so torqued and
safety wired lock bolt

Tuesday, January 15, 2019

Firewall Forward Kit - Propeller

Propeller mounted ( 4 hrs )

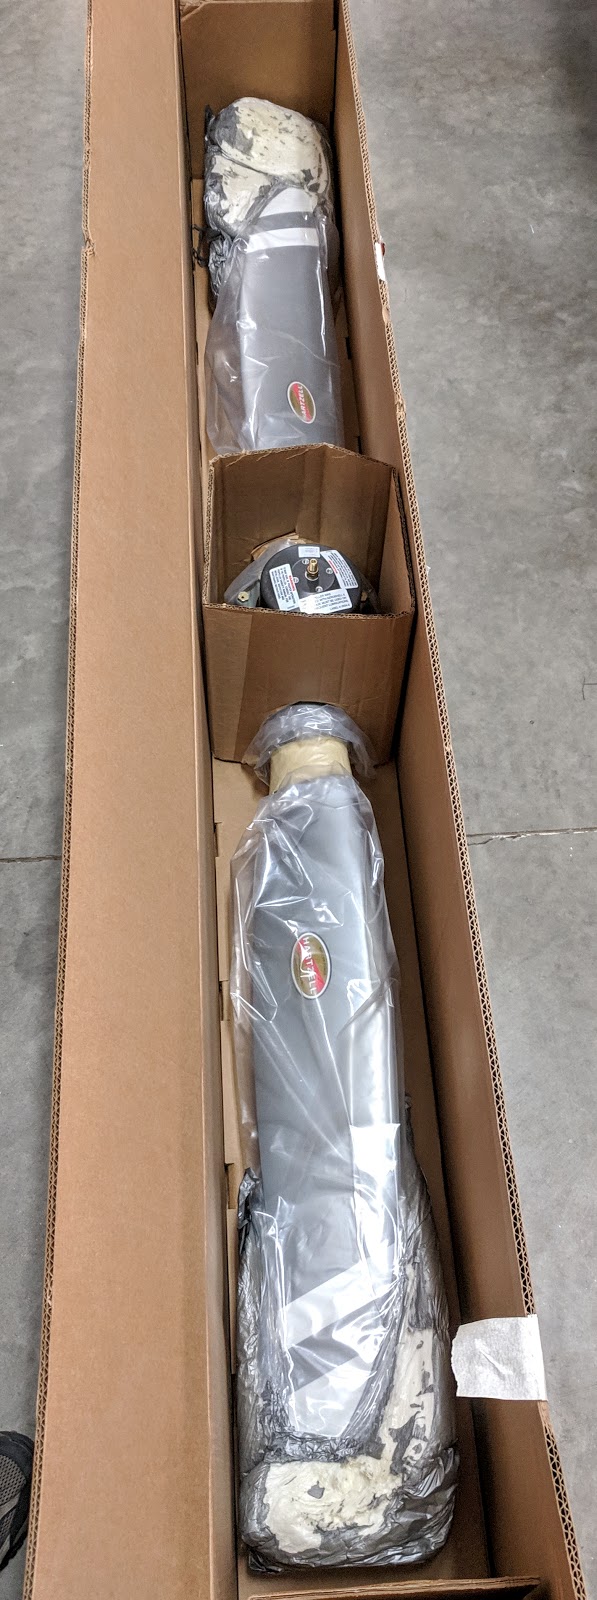
Safety wired alternator attach bolt per Sect 51-06 (waiting until after Prop installed to tighten Alt belt - so I have a lever to resist turning engine while using the torque/belt slippage process).    Re-opened Propeller box (rec'd late 2017 since ordered same time as Engine to get discount Vans offered) and moved to floor with wife's help.  Mounted Spinner Plate to constant speed hub - torqued to 21 ft-lbs per Table 3-1 in Hartzell Owner's Manual.  VAF has good recommendations from builders on how to remove plug in crankshaft (oil passage to CS prop)  - and it came out easily with slide hammer.  Used engine hoist w/ straps to lift/position Prop to install per Sect 44-02.  Tightened 6 places, but didn't torque/safety wire ...yet.   Reference data on Prop:  Model No. HC-C2YR-1BFP/F7497     Assembly Serial No. NS3530B    Blade 1 L82636,  Blade 2 L82641   ( Low pitch 13.6  High pitch 35.0)
Alternator  safety wired...
Belt tension not yet set for other bolt
"Thar she be..."


Serial No. NS3530B.   (Plate says A-2424 Rev 0 )
Prepping to mount Spinner Plate

Hartzell PC10 TC P920   HC-C2YR-1BFP
        Sticker confirms documentation:
Blade 1 Serial # L82636, &  Blade 2 Serial # L82641


B-2428-1  Rev AS   SN171765.

Confirmed O-Ring in place as mounting Spinner Plate

Torqued Hub Clamp Bolts to 21 Ft-lbs per Hartzell manual

Followed VAF recommendations to remove
plug  in front of crankshaft.   Came out easily...
with couple ounces oil spilling out.

Nancy helped secure Propeller. 
It's a lot easier with two people!

Yay!   It fit....

Tah Dah !   
Looks big since close to camera...

Monday, January 14, 2019

Firewall Forward Kit - Propeller

Propeller and Spinner  ( 3 hrs )

Finished cutting out center of Spinner Plate.  Deburred, cleaned and primed with Napa 7220 self-etching primer.  Riveted Doubler to Plate per Sect 44-02.  Deburred and primed S-603 Front Spinner Bulkhead.
nearly done cutting out center of Plate

mostly done deburring....ready to prime, then rivet

Riveted.   Decided to leave doubler "as-is" with pure alum
coating for corrosion protection

Saturday, January 12, 2019

Firewall Forward Kit - Propeller

Canopy Harness and Propeller & Spinner ( 3 hrs )

Added Wht/Blk wire with Molex male pin to Canopy Harness for Pin #7 position to connect to 3rd wire for Red LED and White LED strips.   Added silicone at two places where canopy latch warning wires enter and exit canopy frame on LH side.   Started Sect 44 Spinner & Propeller w/ Steps 1 & 2 at 44-02: Spinner Plate and Doubler Ring.   Good to get back to working on aluminum vs wires.
Bolts hold doubler in position to match drill #30 holes. 
Marked cut line on Spinner Plate

drilled and cleco'd  

Lots of deburring, then cut center out of Spinner Plate.