I've started my adventure to build a Van's Aircraft RV14a. For several years, I've been planning to build an Experimental (homebuilt) airplane - once retired.
But first, I needed to get my Pilot's License. (Kinda key !) So... first things first: I retired March 2014 from Caterpillar - and started flying lessons in the Summer of 2014. Soloed a day after Christmas, and got my Private July 2015. Shop set up, tools acquisition, and practise kits during Fall launched me into my build starting Dec 31, 2015 !

I've chosen to build the RV14a since it's about 10% larger than Van's prior models - so it fits my 6'4" frame well. Van's is well known for great value & outstanding flying qualities. It's been a no brainer decision for me. A tour of their facilities and demo flight in Oct 2013 clinched the deal. My wife - also a pilot - exclaimed after her demo flight "retire NOW so you can build one of these". The RV14a fits my mission of a good compromise between cross country & aerobatics. Plus...I fit, too.

So far, one month into building, it's been rewarding. Very challenging, but certainly a learning experience. The builder community is terrific - as is Van's tech support. I'm finished with the Vert Stab and Rudder (Jan 2016). So... with a 5 month delivery lead time, I've ordered the Quick Build Wings and Fuselage.

I hope this blog assists other new builders, just like several others have been valuable to me. Plus it will serve to document my build step by step. Please drop me a line via the "contact me" form on lower RH margin.
Update: April 2020 relocated to Wickenburg, Az to escape Illinois winters.

Saturday, January 14, 2017

Wings

Elect Aileron Trim (4 hrs )

Installed LH Flap to confirm fit & operation, then returned to safety of "storage" room.  Aligns with Aileron well.


RH tank leak test completed -- no bubbles found and balloon stays inflated at least 24 hrs.  Yay !     Rec'd from Vans the 4 AN3-13A bolts (error to not include in QB kit), so I replaced the temporary  -12A bolts.

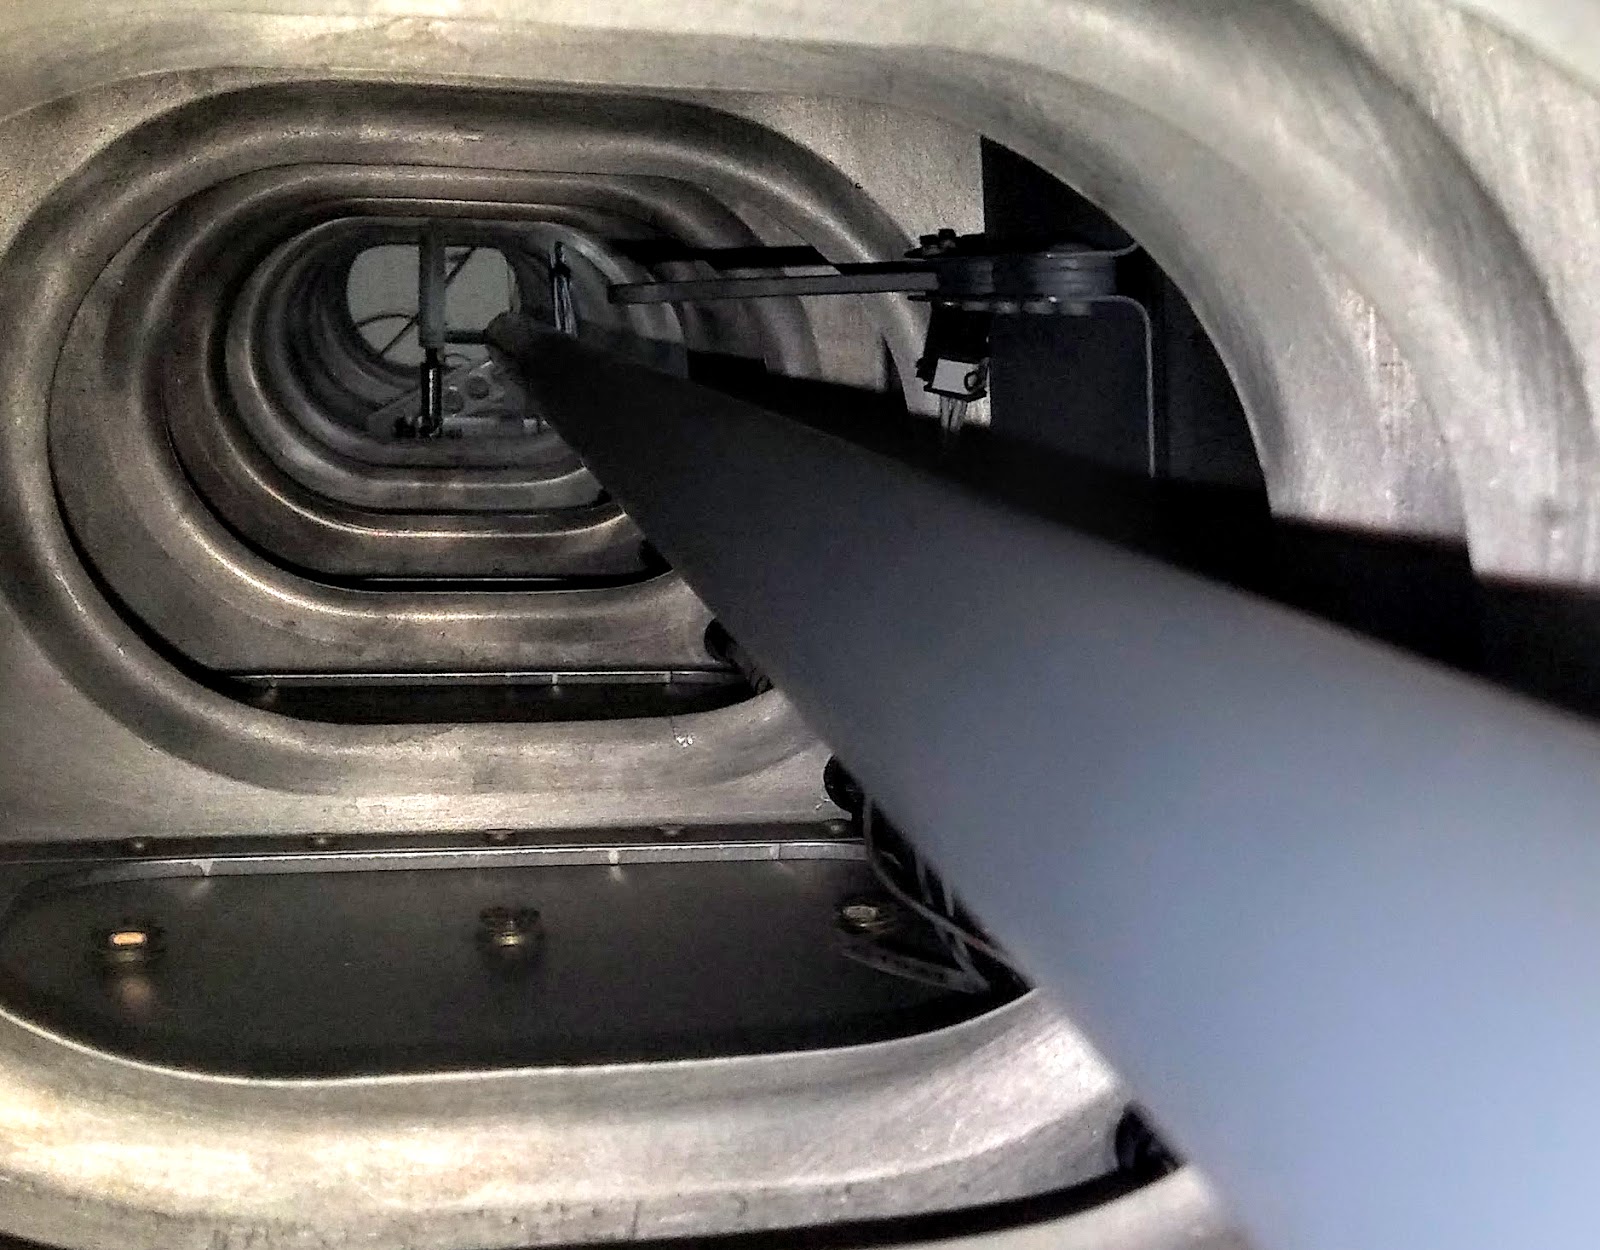
Completed Electric Aileron Trim build, Sect OP 38-04, 05 and 06.  Drilled, deburred, dimpled, primed and attached nutplates. Took several pics inside wing to confirm clearances and setup. Some with endoscope (lower resolution).


Crimped Molex Micro-fit Pins onto 5 wires, then inserted into Molex connector.   Really challenging since tiny pins.   Test fit into mating connector inside access bay.  A little stiff first, then seemed easy to re-insert.  Discovered one of the female pins was driven out of connector.  Needs to be replaced...next work session.   Fortunately I'd ordered spare pins.  [ done 1/16 ]


Friday, January 13, 2017

Wings


Ailerons Adjusted to Neutral, Flap Installed  ( 3 hrs )

Sect 23 -10 completed. Adjusted LH Aileron 1st using W730 jig (template) at Bellcrank and W00026 Alignment Template at end of Aileron.  One turn of rod end on Pushrod CS00013 only needed.   Measured 64.5mm vs 64.3mm spec'd at Torq Tube neutral position. Pending receipt of Van's W730 actual template for final confirmation, but within 0.2mm (.007") is quite accurate -within 1/2 turn of rod ends.   Repeated for RH Wing with 1 turn of Aileron Pushrod, and 1/2 turn to main Pushrod.  Measuring 64.3mm and neutral at Bellcrank and Aileron with templates installed.   Not torquing AN3 bolts/locknuts since will remove Ailerons and Pushrods when I rivet bottom skins. Very satisfying for the smooth and easy movements of the Ailerons.
LH Aileron neutral position
LH Pushrod to Aileron
LH Aileron pushrods & Bellcrank
RH Aileron neutral position
 Mounted Flap to check clearances and position.   Good to GO !

Thursday, January 12, 2017

Wings

Ailerons mounted  ( 1 hr )

Mounted LH and RH Ailerons to Wings and Pushrods.   Some adjustment required using washer positions (reversed location of 2 washers vs 1 ) to center aileron between hinge supports to avoid contact with rivet heads on hinge brackets.  Documented in instructions so I can repeat after dis-assembly, etc.   NOT tightening locknuts at this time since expecting some adjustments will be required to neutralize position.  Also, will be removing pushrods and Ailerons when I rivet on bottom skins...so I know they're coming off soon.
 

Wednesday, January 11, 2017

Wings

Pushrods Installed ( 3 hrs )

Sect 23-09:  Installed Pushrods between Torq Tubes and Bellcranks for both wings.  (I discovered Vans failed to provide W-730 template used to align bellcranks in neutral position.  When I contacted them, they emailed a dimensioned drawing (and sent the actual one in the mail I plan to use to confirm alignment).  I determined only 1 dimension was critical and some of the shapes were unnecessary - so making the template was relatively easy vs the all the dimensions w/o tolerances shown to .001".... Their engrg dwgs need to be properly dimensioned !

I left fasteners loose to allow final adjustments.   Really like having the Washer Wrenches from Cleaveland Tools...one is shown in pic at inboard rib area near Torq Tube.   These make slipping in small washers much easier - with so much less cussing.
RH Wing...pushrod connected
Very pleased with the silky smooth operation of the control linkages - extra time spent getting the brass bushing fit just right at Bellcranks seems to be paying off.
LH Wing...note fastener not tighted...yet.

RH Wing Bellcrank w/ W730 template holding neutral position
   Autopilot support bracket installed...pending Servo install.

LH Wing Bellcrank..  Loose nuts until final adjustments.

Tuesday, January 10, 2017

Wings


Bellcranks Installation ( 3 hrs )

Switched schrader air valve to RH tank along with cap for air line so I can test for leaks.   Holding air in balloon long time, but didn't get around to checking with soapy water (optimistic though !).


Meanwhile I determined center of travel of Electric Aileron Trim Actuator using 9V battery to exercise through full travel.   Ready to install next.  

Since I received the backordered Bellcranks from Vans Monday, I now could do Sect 23-05 - installing Bellcranks. The long brass bushing required much more than simple deburring of ends to insure easy & smooth rotation of bellcranks.  I spent a LOT of time gently (no undo option !) reducing brass diameter and smoothing insider of Pivot Tubes.  Seemed weldment onto Pivot tubes may have caused distortion.
showing brass bushings...partially installed in pivot tubes


Finally achieved free and easy rotation.  Installed LH and RH Bellcranks into Wings. Yay !

Monday, January 9, 2017

Wings

Cont'd Electric Aileron Trim  ( 2 hrs )

Electric Aileron Trim assembly continued at Steps 3-6 Sect OP38-02 and  -03 Step 1 & 2.  Drilled #30 holes, deburred edges, cleaned, primed.  Mounted Ray Allen servo and linkage.

Saturday, January 7, 2017

Wings

Tank Leak Test, Autopilot installation  ( 3 hrs )

LH tank testing:  Only place I've been identifying leaks was at the balloon attached to the tank.   Replaced balloon, applying thread sealant prior to slipping onto fitting.  Used band of strong tape, followed by safety wire twisted tight (thanks Vans Air Force for tip to use safety wire/pliers !).  Finally....no bubbles at balloon attach !    Now I can concentrate on confirming no other leaks.  So far all I could reach showed no signs of bubbles w/ generous applications of soap suds.
 

Started Optional Sect 56 - Garmin Autopilot Servo install kit.   Bolted on Roll Servo Brace in right wing, built 1 Pushrod for Pitch servo, and 1 Pushrod for Roll Servo (1/8" longer).  That all I can do in the wing until I purchase the Garmin Servo - which I probably won't buy until I purchase the Garmin G3X avionics (displays, etc).
Powder coated white brace added to bellcrank mount on Right Wing Spar
Looks simple, but alum tubes required drilling and taping for 1/4-28 threads.
Getting started on the Optional Sect 38 -  Electric Aileron Trim.  Drilled #30 holes & deburred mounting brackets.