I've started my adventure to build a Van's Aircraft RV14a. For several years, I've been planning to build an Experimental (homebuilt) airplane - once retired.
But first, I needed to get my Pilot's License. (Kinda key !) So... first things first: I retired March 2014 from Caterpillar - and started flying lessons in the Summer of 2014. Soloed a day after Christmas, and got my Private July 2015. Shop set up, tools acquisition, and practise kits during Fall launched me into my build starting Dec 31, 2015 !

I've chosen to build the RV14a since it's about 10% larger than Van's prior models - so it fits my 6'4" frame well. Van's is well known for great value & outstanding flying qualities. It's been a no brainer decision for me. A tour of their facilities and demo flight in Oct 2013 clinched the deal. My wife - also a pilot - exclaimed after her demo flight "retire NOW so you can build one of these". The RV14a fits my mission of a good compromise between cross country & aerobatics. Plus...I fit, too.

So far, one month into building, it's been rewarding. Very challenging, but certainly a learning experience. The builder community is terrific - as is Van's tech support. I'm finished with the Vert Stab and Rudder (Jan 2016). So... with a 5 month delivery lead time, I've ordered the Quick Build Wings and Fuselage.

I hope this blog assists other new builders, just like several others have been valuable to me. Plus it will serve to document my build step by step. Please drop me a line via the "contact me" form on lower RH margin.
Update: April 2020 relocated to Wickenburg, Az to escape Illinois winters.

Thursday, September 8, 2016

Empennage

Empennage Fairings (2 hrs )

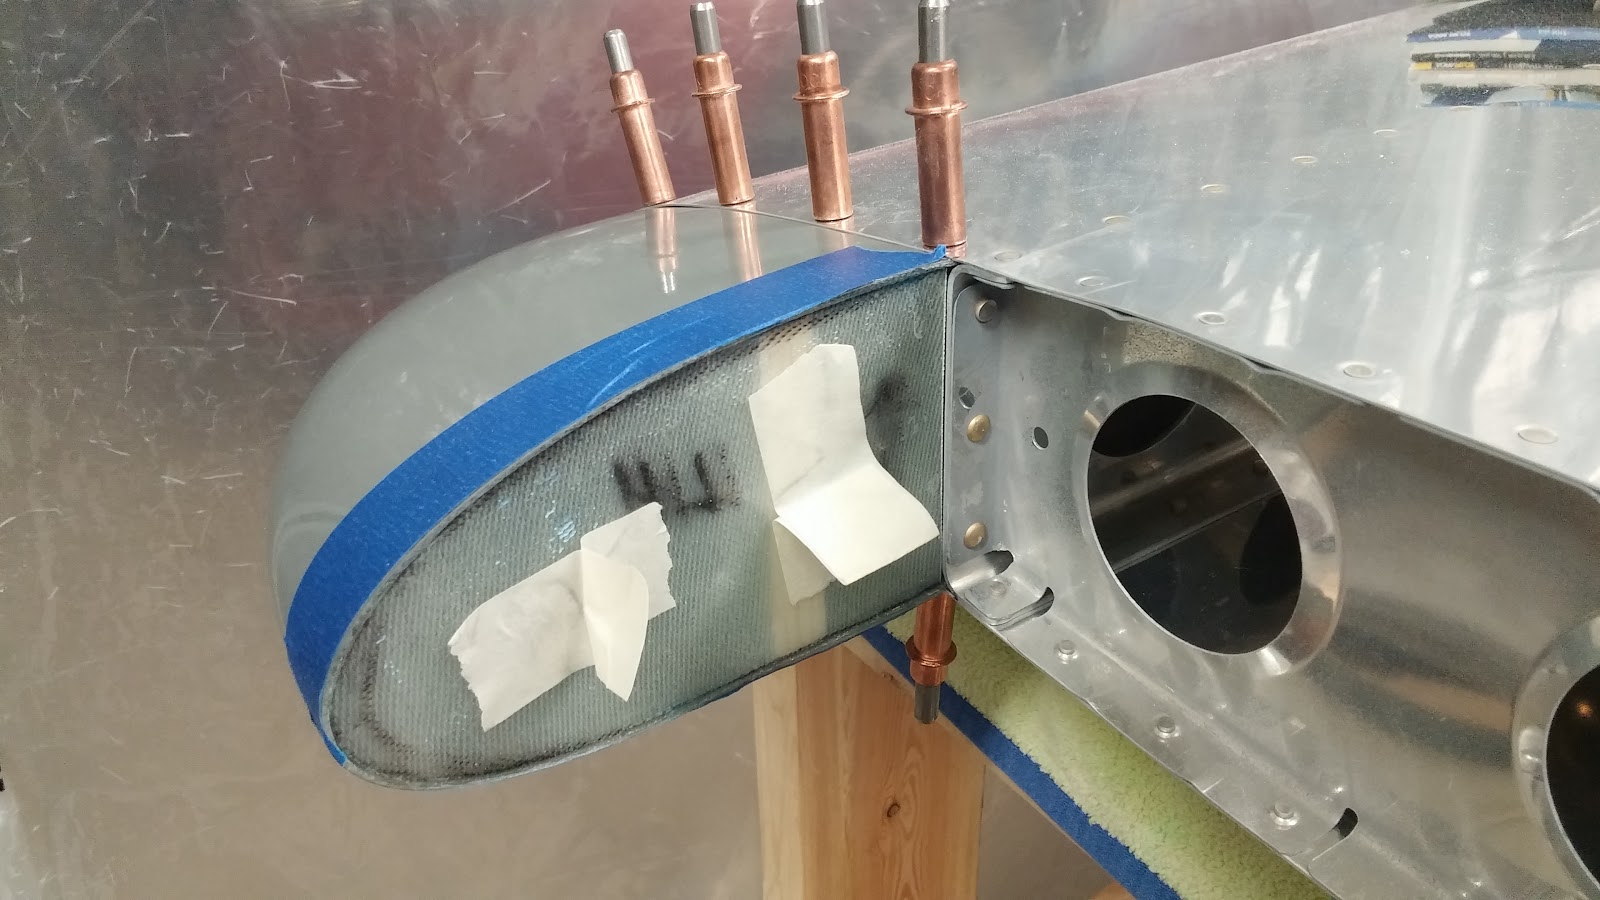
Cut fiberglass patch that cured overnight, and trimmed to fit into Vert Stab Tip Fairing.  I prefer to inset about 2mm vs flush, so I have better clearance to swinging Rudder, but from sides appears only 3mm clearance.  Kind of matches appearance of Vert Stab meeting Rudder, Or Horiz Stab meeting Elevators at hinge lines, too.  Plus I was able to force Tip into more accurate profile matching Rudder Fairing.    I inserted patch, then "tacked" into place using cyanoacrylate glue.   This allows me to immediately follow up with reinforcing with fiberglass strips and resin on inside.
After fiberglass strips on inside cure, I'll add "chamfer" of epoxy filler on outside
Since I had extra epoxy resin, I added 410 Microlight to peanut butter consistency so I could apply another layer to LH Elevator at transition from Tip to Alum.  This was after sanding first application...and this will likely be final.
Second application of epoxy filler...after sanding first layer.

Wednesday, September 7, 2016

Empennage

Empennage Fairings (2.5 hrs )

Sect 12-07 Steps 1-3 completed for Vert Stab Tip Fairing:  trimmed to fit.  Even though Van's instructions don't include,  I mounted the Rudder to insure proper 3mm clearance.   Glad I did, as slight adjustment (angle of front of Rudder) was appropriate for a consistent gap.   Once in position, I drilled #40 holes & reamed with #30 to allow me to remove and re-attach as I checked clearance.  Quickly made fiberglass patch.  I had plenty of resin, so also mixed in West Systems 410 Microlight to start smoothing in the transitions from alum to fiberglass.   Close up appearance will be improved, but going to keep to a minimum so I limit unnecessary weight.

checking with template.  Green layer is release ply.

Tuesday, September 6, 2016

Empennage

Empennage Fairings ( 1.5 hrs )

After fully curing, I sanded with 400 grit the perimeter chamfer on LH & RH Tip Fairings.  Installed in Horiz Stab via blind rivets.  Fits great - really solid.   I also sanded the leftover filler I applied to front of Elevator tips to blend in to Counterweight aluminum.  I like how easy this was to sand, yet seems very tough material with great adhesion.
Filler sanded smooth
Attached.


Monday, September 5, 2016

Empennage

Empennage Fairings ( 1.5 hrs )

Only took a few minutes to dimple Horiz Stab and C'sink Tip Fairings.  Then I mixed West Systems 105 resin with 206 Hardener, adding in 410 Microlight (microspheres) until reached a "peanut butter" consistency.  With this much microlight added, expect it will be easy to sand.   Applied around perimeter of inset fiberglass sheet to create a smooth chamfer.   Since I had extra, used to start smoothing in leading edge of LH & RH Counterweight transition to fiberglass on Elevators.   Since need to cure several hours, time to go swimming !

after removing tape...


Saturday, September 3, 2016

Empennage

Empennage Fairings ( 1.5 hrs )

Friday, Sept 2

Steps 5 - 7, Sect 12-06 now done for both LH and RH Horiz Stab Tip Fairings.  Ready to dimple HS and C'sink fiberglass...then blind rivet - but need to wait for epoxy resin to cure.

Thursday, September 1, 2016

Empennage

Empennage Fairings ( 2 hrs )

Cut out new fiberglass "sheet" to fit into LH Tip fairing.   Decided to reinforce with 3/8" square balsa from top to bottom to insure Tip fairing was properly "expanded", and would not bow in or out (which could cause an interference).   I recessed approx 1/16" so no possible interference with swinging counterweight on Elev.   Being "inside" insured correct profile too.  With Tip fairing installed via cleco's on Horiz Stab, I simply used cyanoacrylate (instant glue) to hold in position.  Removed and added fiberglass layer to inside to secure to Tip.   It's really solid now !    I used same batch of epoxy resin to make RH Tip plate ( 2 x 9 oz cloth layers).


Wednesday, August 31, 2016

Empennage

Empennage Fairings ( 3 hrs )

Layed up my first fiberglass "sheet" -  two layers of  9 oz ( medium weight ).   Per instructions, selected scrap aluminum and marked outline, then waxed surface using candle wax.   The green cloth is nylon release ply.  Since not sure this will work well, I've layed extra material to test.   Using West System 105 Resin, and 206 slow Hardener.   Also purchased West System pump pack, which makes dispensing correct amounts really simple and clean.    The exposed surface seems to be smooth enough for the inside surface anyway.   Otherwise, repeated trimming RH Tip just as I did yesterday for LH.  Drilled #40, then Final Drilled via #30 reamer.  This side seemed to go quicker since I learned considerably from LH Tip.