Empennage Fairings ( 2 hrs )
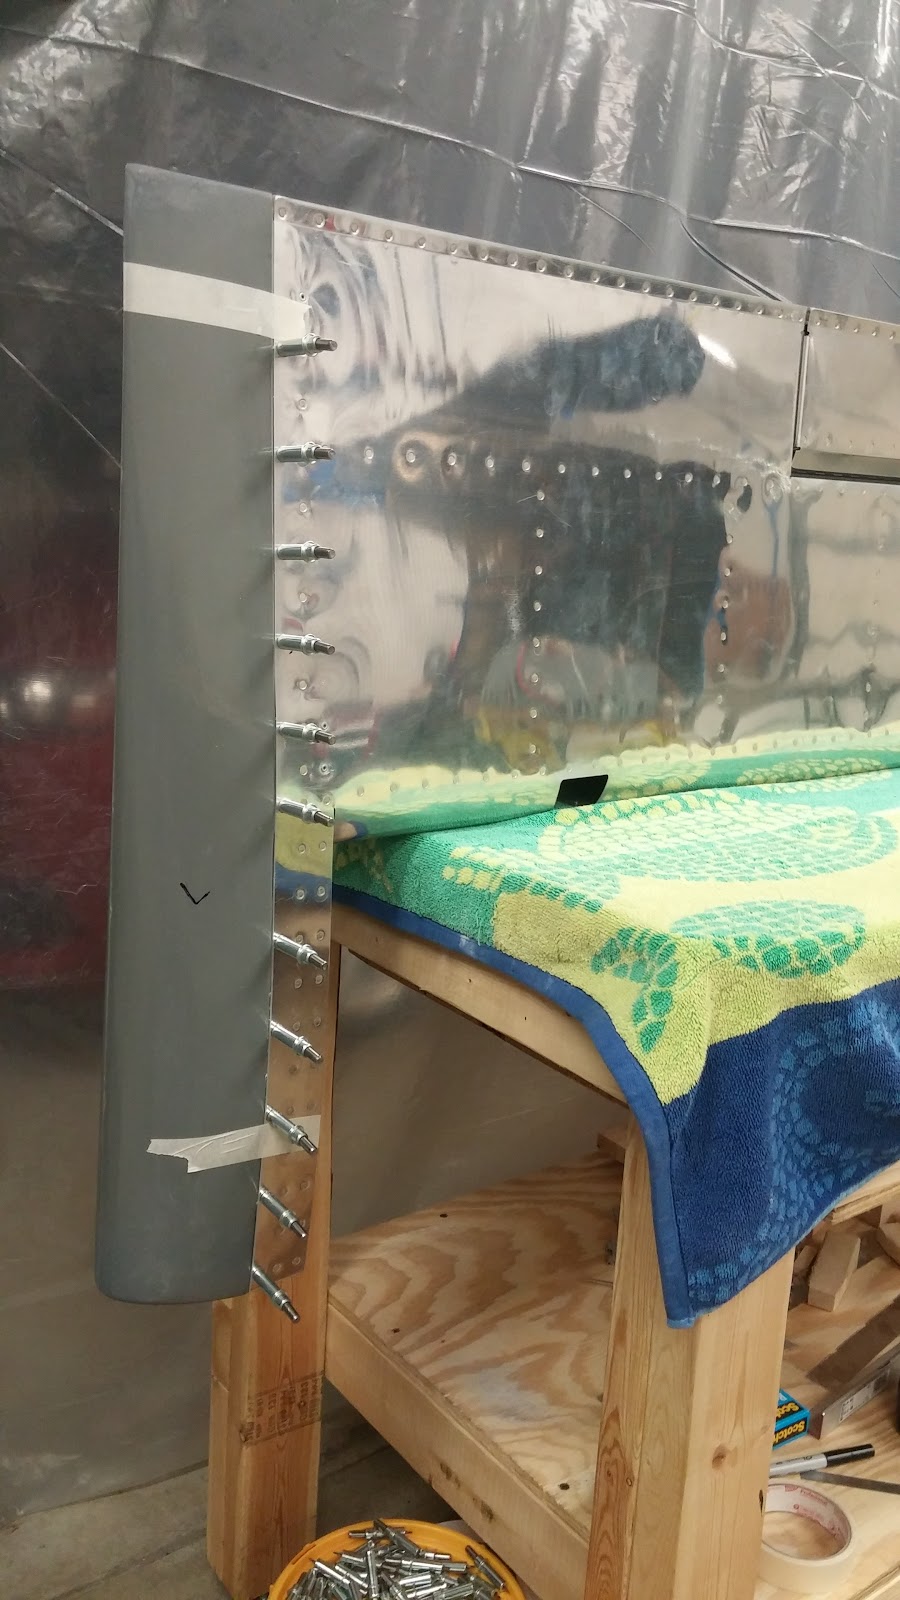
Dimpled LH Elevator skins at Tip mounting holes. Required removal of Counterweights to access most forward holes - so re-installed with new lock nuts & retorqued. This time I applied JB Weld epoxy adhesive to each counterweight to reduce likelihood of ever coming loose. Very carefully countersunk each fiberglass hole. These have to be deep enough for the dimples, but not too deep to start enlarging the holes !
When re-assembling Tip with clecos - I discovered a couple holes on top and bottom near center had the cleco "pull through". Due to countersinks, insufficient fiberglass at those holes to pull the shell outward 1/4 inch toward the skins (during drilling I used wood spacers temporarily to push Tip outward to skin surfaces...but didn't want to leave them inside unless absolutely necessary. So I reinforced hole perimeters with cyanoacrylate - then cleco's pulled fiberglass shells outward so flush with skin. Yeah ! ( Van's should design/process the Tips so actually oversized in center area...so would require lightly squeezing between top and bottom skins...instead of having to pull outward ) Expect OK when I blind rivet these next.
Thursday, August 25, 2016

Wednesday, August 24, 2016
Empennage
Empennage Fairings ( 3 hrs )
Worked on LH and RH Elevator Tips (sect 12-05)...trimming to fit at TE, and reduced flanges to 1/2". Very satisfying to see good fit up along entire edge of Elevator(s). Drilled #30 holes in both, cleco'ing as I went. ( Note: added simple wood blocks as temporary spacers to spread fiberglass tips in middle section for good fit prior to drilling ). Used reamer to Final Drill the #40 holes for RH. Ready to do same for LH, but decided to go swimming instead !


Worked on LH and RH Elevator Tips (sect 12-05)...trimming to fit at TE, and reduced flanges to 1/2". Very satisfying to see good fit up along entire edge of Elevator(s). Drilled #30 holes in both, cleco'ing as I went. ( Note: added simple wood blocks as temporary spacers to spread fiberglass tips in middle section for good fit prior to drilling ). Used reamer to Final Drill the #40 holes for RH. Ready to do same for LH, but decided to go swimming instead !

Monday, August 22, 2016
Empennage
Empennage Fairings (3 hrs )
Added flock to epoxy, then adhered doubler to Bottom Fairing along with 2 flush blind rivets. Used toothpicks to keep epoxy out of 2 tapped holes. Moved to Sect 12-05 Rudder Tip -- trimmed to 1/2 inch and removed tail area to clear T.E. Once satisfied with fit, drilled 18 holes (#40 followed by #30). Then dimpled skin, and machine C'sunk the fiberglass...and blind riveted. Pleased with excellent fit and very solid attachment.


Added flock to epoxy, then adhered doubler to Bottom Fairing along with 2 flush blind rivets. Used toothpicks to keep epoxy out of 2 tapped holes. Moved to Sect 12-05 Rudder Tip -- trimmed to 1/2 inch and removed tail area to clear T.E. Once satisfied with fit, drilled 18 holes (#40 followed by #30). Then dimpled skin, and machine C'sunk the fiberglass...and blind riveted. Pleased with excellent fit and very solid attachment.


Saturday, August 20, 2016
Empennage
Empennage Fairings ( 2 hrs )
Sect 12-03 - Added Rudder Fairing Doubler (alum) to Rudder Bottom ...to ultimately mount LED taillight. This is last major step involving the Bottom fiberglass - so drilling and cutting into this area now was a little intimidating. (don't want to start this over!) So proceeded cautiously...and it turned out fine. I was extra careful tapping the small 4-40 threads in this thin doubler...especially aluminum. Not convinced these threads are robust...so I'll be seeking some alternatives to re-inforce.
Sect 12-03 - Added Rudder Fairing Doubler (alum) to Rudder Bottom ...to ultimately mount LED taillight. This is last major step involving the Bottom fiberglass - so drilling and cutting into this area now was a little intimidating. (don't want to start this over!) So proceeded cautiously...and it turned out fine. I was extra careful tapping the small 4-40 threads in this thin doubler...especially aluminum. Not convinced these threads are robust...so I'll be seeking some alternatives to re-inforce.
 |
| Set up for tapping 4-40 threads in doubler. I hand turned chuck while applying steady modest down force. Whew...A-OK ! |
 |
| Ready to bond with epoxy while installing via 2 blind rivets. |
Thursday, August 18, 2016
Empennage
Empennage Fairing ( 3 hrs )
Sect 12-02 completed with Steps 6-7: dimpled nutplates, machine countersunk two locations on rudder horn. Riveted all 18 nutplates. 3 of these near aft end are really tough to rivet (w/ small gap between LH and RH skins). Needed to use my thinner bucking bar plate with the tungsten bar as backup for sufficient mass. But I got 'em done. Installed fiberglass bottom with 18 flush head screws. Turned out really good...YEAH !
Sect 12-02 completed with Steps 6-7: dimpled nutplates, machine countersunk two locations on rudder horn. Riveted all 18 nutplates. 3 of these near aft end are really tough to rivet (w/ small gap between LH and RH skins). Needed to use my thinner bucking bar plate with the tungsten bar as backup for sufficient mass. But I got 'em done. Installed fiberglass bottom with 18 flush head screws. Turned out really good...YEAH !
 |
| nutplates installed with rivets. Need to redo primer... |
 |
| Rudder Bottom Fairing installed with 18 flush screws. SWEET ! |
 |
| Like the fit up. Next: install LED tail light. |
Wednesday, August 17, 2016
Empennage
Empennage Fairings ( 1.5 hrs )
Completed nutplate rivet holes (#40's), and dimpled. 2 more remain requiring machine countersink in thicker material at rudder horn. Those toward aft end of Rudder were challenging...but feasible using Cleaveland Tools "Close Quarters Die Set" But... I forgot I could have used the "Tight Fit Dimpling Fixture" that I also have from Cleaveland Tools.
Completed nutplate rivet holes (#40's), and dimpled. 2 more remain requiring machine countersink in thicker material at rudder horn. Those toward aft end of Rudder were challenging...but feasible using Cleaveland Tools "Close Quarters Die Set" But... I forgot I could have used the "Tight Fit Dimpling Fixture" that I also have from Cleaveland Tools.
Tuesday, August 16, 2016
Empennage
Empennage Fairings ( 2 hrs )
Final drilled eighteen #27 holes for attachment screws. Decided to Machine C'sink fiberglass Rudder Bottom while still attached w/ cleco's - so #27 holes in alum underneath guide #6 C'sink (vs Van's instructions to do last and while unattached). My trial piece of only fiberglass seemed to allow C'sinks to drift as fiberglass hole was enlarged. Then started drilling rivet holes for nutplates using #6 screw to hold in position.
Final drilled eighteen #27 holes for attachment screws. Decided to Machine C'sink fiberglass Rudder Bottom while still attached w/ cleco's - so #27 holes in alum underneath guide #6 C'sink (vs Van's instructions to do last and while unattached). My trial piece of only fiberglass seemed to allow C'sinks to drift as fiberglass hole was enlarged. Then started drilling rivet holes for nutplates using #6 screw to hold in position.
 |
| countersinks in fiberglass (used clecos to hold as Machine C'sunk. |
 |
| starting to add rivet holes for nutplates |
Subscribe to:
Posts (Atom)