I've started my adventure to build a Van's Aircraft RV14a. For several years, I've been planning to build an Experimental (homebuilt) airplane - once retired.
But first, I needed to get my Pilot's License. (Kinda key !) So... first things first: I retired March 2014 from Caterpillar - and started flying lessons in the Summer of 2014. Soloed a day after Christmas, and got my Private July 2015. Shop set up, tools acquisition, and practise kits during Fall launched me into my build starting Dec 31, 2015 !

I've chosen to build the RV14a since it's about 10% larger than Van's prior models - so it fits my 6'4" frame well. Van's is well known for great value & outstanding flying qualities. It's been a no brainer decision for me. A tour of their facilities and demo flight in Oct 2013 clinched the deal. My wife - also a pilot - exclaimed after her demo flight "retire NOW so you can build one of these". The RV14a fits my mission of a good compromise between cross country & aerobatics. Plus...I fit, too.

So far, one month into building, it's been rewarding. Very challenging, but certainly a learning experience. The builder community is terrific - as is Van's tech support. I'm finished with the Vert Stab and Rudder (Jan 2016). So... with a 5 month delivery lead time, I've ordered the Quick Build Wings and Fuselage.

I hope this blog assists other new builders, just like several others have been valuable to me. Plus it will serve to document my build step by step. Please drop me a line via the "contact me" form on lower RH margin.
Update: April 2020 relocated to Wickenburg, Az to escape Illinois winters.

Monday, January 28, 2019

Avionics - Landing and Nav Lights

Landing and Nav Lights ( 2 hrs )

Primed and painted flat black both Landing Light brackets.  Crimped on ring terminals to wires per OP52A-02.   Follow up to Jan 26 entry: Vans product support (Gus) explained the 5 Pin Molex (Molex #03-06-2055) is no longer available (anywhere!...I checked), so in 2018 AeroLED changed to include Molex 4 Pin connectors in Nav Light kit LN-201-1.   Now, NOT compatible with WH00011 wiring harness installed 2 years ago that includes the female 5 Pin Molex.   Drat!  Gus recommended couple options, including simply plugging each male-female Pin together, covering with heat shrink tubing to retain and protect...when I install Wing Tip/Nav Light ass'ly.
painted flat black after priming


Per OP52A-02:  Ring terminals added. 
(One wire is terminated in butt splice)

Saturday, January 26, 2019

Avionics - Nav Lights and Landing/Taxi Lights

Nav/Strobe Lights and Landing/Taxi Lights ( 4 hrs )

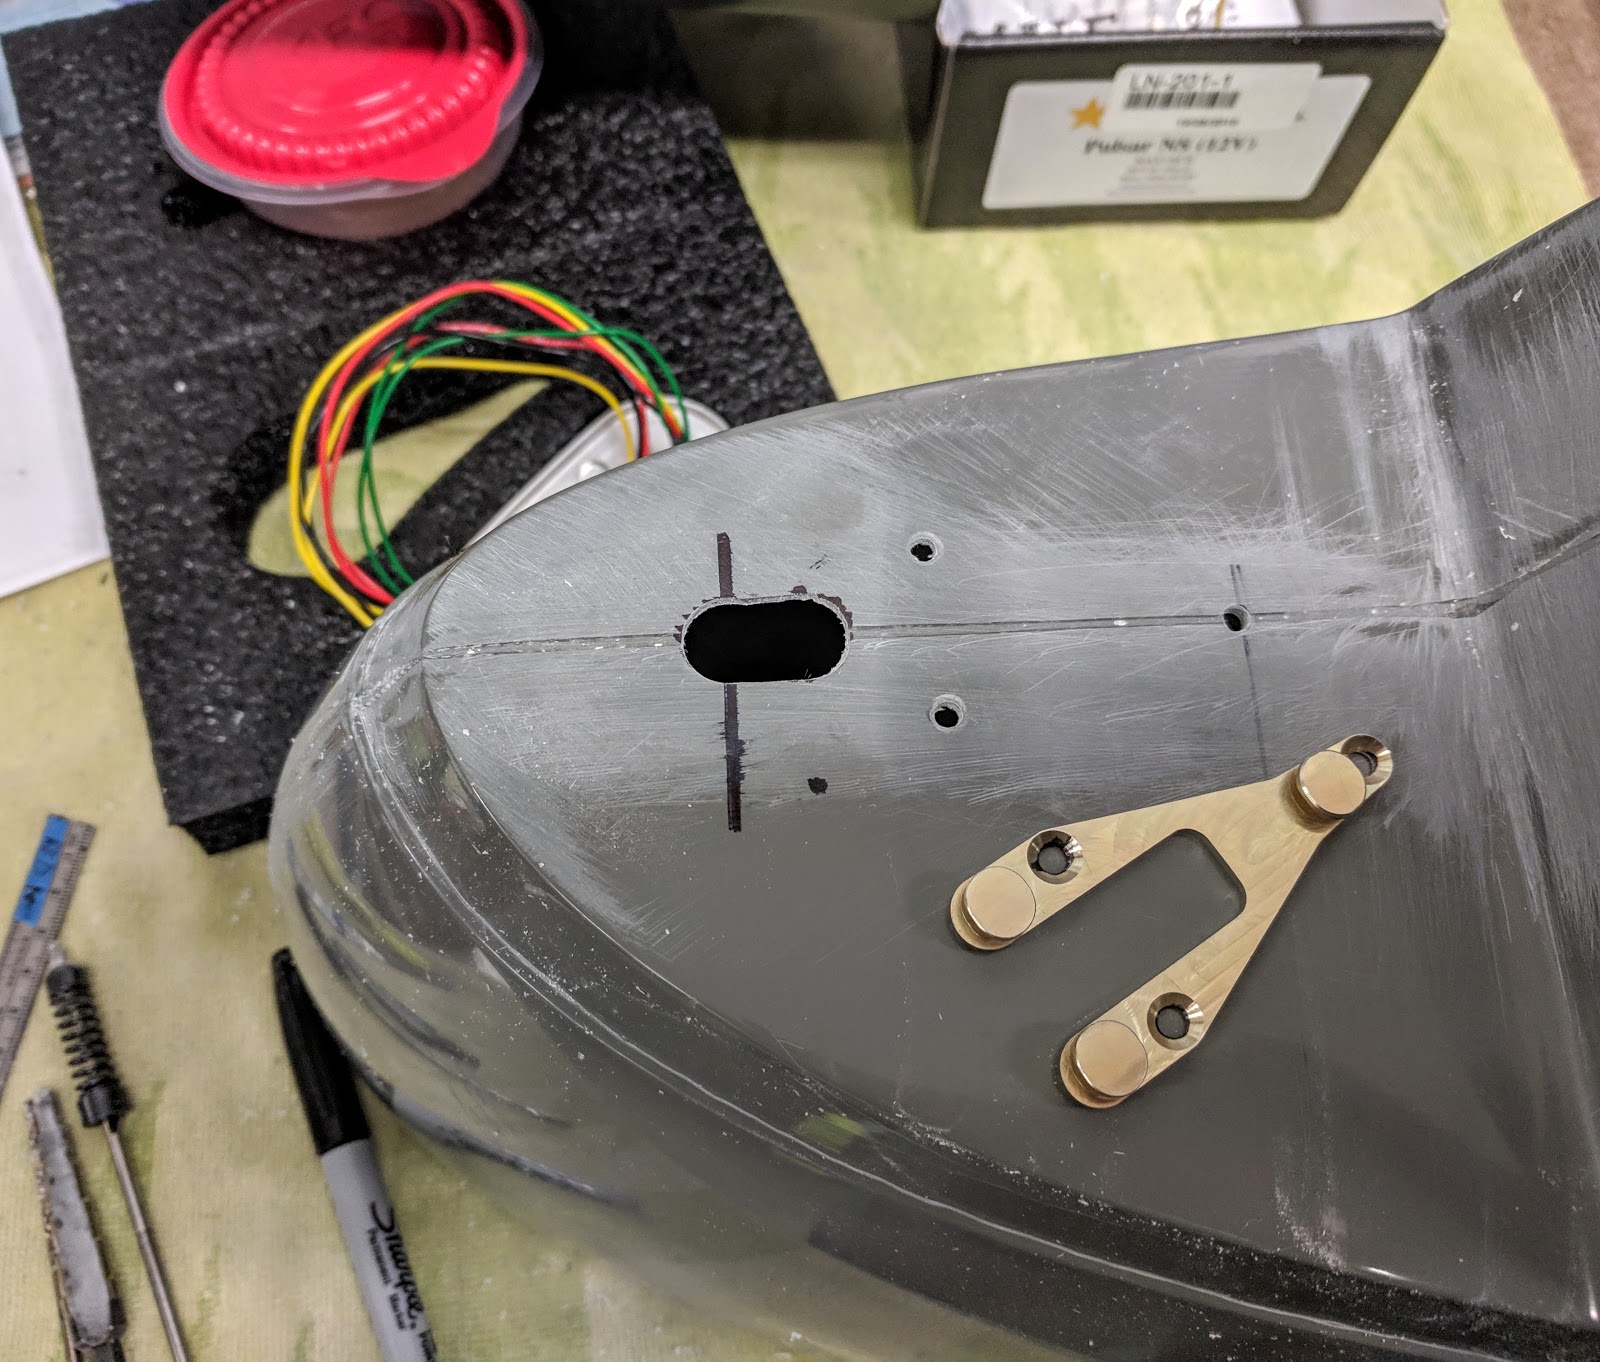
Completed mounting LH (green) and RH (red) Wing Tip Nav/Strobe Lights (Vans # LN-201-1)  per OP55-02 Steps 1-3.   Simple drilling and uni-bit to prep Wing Tip, then attached mounting plates.  Crimped Molex pins to 4 wires on each.  LN-201-1 comes with 4 Pin female Molex, but Wing kit wiring already has 5 Pin male Molex.  Aarrgghhh!  Vans OP55-03 shows 5 pin female Molex.  Since Wing has mounting slot set up for the 5 Pin, I'm contacting Vans to provide correct female 5 pin Molex connectors.   Meanwhile, completed Steps 1-4, Sect OP52A-01, "Aero LEDs Sunspot LX Landing and Taxi Lights":  Created (8) 10 mm long spacers.  Deburred all holes, edges and slots.   Added 8 nutplates.  Ready to prime and paint flat black.
RH ready to for mounting plate.  Slot allows Molex
connector to pass, if already done
Ready to mount light...but
added Molex pins first


RH side "done"...bottome LH light shown for reference
LH  done


time consuming to create 8 spacers each 10 mm long (w/o lathe)

deburring done...ready to add nutplates

Trial assembly.  Planning to prime and paint Mon
when weather is not so cold!

Friday, January 25, 2019

Firewall Forward Kit - Propeller

Spinner completed ( 3 hrs )

Loosened Spinner Plate from Prop Hub (actually removed nuts and washers so completely "off") so I could rivet Gap Fillers per Sect 44-07, Step 7.   Re-assembled & torqued Hub bolts/nuts to 21 ft-lbs per Hartzell Manual Table 3-1.  Trial fit Top Cowl to check gap to Spinner Plate.   Marked Spinner to trim to match edge of Spinner Plate.  Re-installed Spinner and sanded flush to edge of Plate completing Step 8, Sect 44-08.   Now done with Propeller and Spinner!
Spinner Plate loose from Hub to enable
riveting Gap Fillers
Re-installed Spinner Plate after riveting each Gap Filler.   Excess past edge of Spinner Plate yet to be removed


checking with Top Cowl to insure clearance, and
need to remove aft edge Gap Filler, as well as
similar overhang on Spinner.   ( after this pic, 
sanded Gap Filler and Spinner flush to aft edge
of Spinner Plate)

Thursday, January 24, 2019

Firewall Forward Kit - Propeller

Spinner mounting ( 3 hrs )

Added remaining nutplates to Spinner Plate.  Checked fit of Gap Fillers and Spinner to Prop Blades as angled from min to max pitch per Step 6, Sect 44-07.  (per instructions, clamped 30" boards to blade about 10" from end for leverage).  Trimmed small amount fiberglass to meet 1/8" clearance.  Torqued and safety wired 4 bolts holding Front Bulkhead.  Started Step 7 to rivet Gap Fillers to Spinner Plate  - but determined I will need to loosen 4 bolts holding Plate to Hub to gain tool clearance.  At first it seemed I could rivet with Plate still in place, but 2 rivets are too close to blades for either "Main Squeeze", or rivet gun/bucking bar.  Drat...    Received shipment from Vans with my Landing Lights and Wing Tip Nav/Strobe Lights.   These are Aero LEDs recommended by Vans. 
Front Bulkhead for Spinner
All 22 nutplates and Screws installed.
Final clearance at Prop

Landing Light Kits...brackets, hardware

Nav /Strobe Lights for Wing Tips

Tuesday, January 22, 2019

Firewall Forward Kit - Propeller

Spinner nutplates ( 2 hrs )

Drilled #19 clearance holes for 6-32 attachment screws (AN526C632-R8).   Riveted on 6 nutplates to Front Bulkhead, then started on 14 nutplates on Spinner Plate.
nutplates on Front Bulkhead
Adding nutplates to Spinner Plate (bit more
challenging since remains bolted to Prop Hub

Monday, January 21, 2019

Firewall Forward Kit - Propeller

Spinner Gap Filler ( 2 hrs )

Completed Spinner Gap Fillers per Sect 44-06, Steps 1-8, and 44-07, Steps 1-2.  Created Backer Plates with matched curve to Gap Filler.  Riveted to fiberglass, then added nutplate.  Fits well - and looks good too.  Final clearance for Prop to fiberglass edges remains to be done ( need to clamp boards to Prop to move from min to max pitch angles)
Almost ready to rivet to Spinner Plate.

Next -  grind/file  fiberglass edges for clearance to  prop 


Saturday, January 19, 2019

Firewall Forward Kit - Propeller

Spinner ( 3 hrs )

Completed Sect 44-03, -04, & -05:  positioning and drilling for mounting.  Needed to trim some for clearance around prop, but template from Hartzell insured good fit (Spinner came with outline marked...slightly more forward than template, but close).   Since opaque (comes with pinholes filled) required use of spherical magnets to locate holes in Front Spinner Bulkhead.  Trimmed cut-out pieces to make Gap Filler behind Prop.  Positioned and drilled #40 holes for rivets.  Since not rotating prop (keep oil from being scraped off cylinders and cams, etc ) I had the pleasure of working from underneath Spinner - not fun, but got  'er done.
Front Spinner Bulkhead has 6 pre-punched holes.  Used
spherical magnets to determine hole location through
opaque Spinnner
6 Spherical magnets in place...ready to
mark hole centerlines and drill.


All holes drilled at Front Bulkhead, and
along rear Spinner Plate
Gap Fillers positioned and drilled for rivets


Working underneath was challenging.